Airflow Docker in Docker with Docker Operator
What's Airflow?
Apache Airflow is an open-source platform for developing, scheduling, and monitoring batch-oriented workflows [1]. You can create a workflows as code which are called DAGs (Directed acyclic graphs).

A DAG is a collection of tasks, organized with dependencies and relationships to say how they should run [2]
What are Providers Packages?
Apache Airflow was built to be modular, so that the core provides the basic tasks and operators, but can be extended by the installation of third party projects, called providers.
Providers could contain operators, hooks, etc for the communication to external systems. Operators, which is a template for a predefined Task, can be declaritevely defined within a DAG. Examples of core operators would be the BashOperator or the PythonOperator.
We would be installing the Docker Provider and use the DockerOperator in this example with Airflow running in Docker.
Why use Docker?
There are several reasons why you would want to use Docker for containerizing your workloads.
-
Portability: Containers enable developers to build and test applications on their own machines, and then easily deploy the same application to different environments, such as staging or production, without worrying about differences in the underlying infrastructure.
-
Isolation: Containers provide isolation between the application and the underlying operating system and infrastructure, which can help to reduce conflicts and dependencies between different applications and environments.
-
Ease of use: Docker provides a simple and consistent way to package, distribute, and deploy applications, making it easier for developers to build and manage applications at scale.
-
Scalability: Docker allows organizations to easily scale applications up or down by adding or removing containers as needed, which can be useful for applications that experience variable workloads or spikes in traffic.
-
Resource efficiency: Containers are lightweight and use resources more efficiently than traditional virtual machines, which can help to reduce costs and improve performance.
You can therefore package all the dependencies inside the container, and Airflow would schedule running the container.
Note that it's also possible to use the BashOperator to run Docker images (with
docker run) when we use this setup, but I thought it would be nice to try out theDockerOperatorin this case.
Airflow Docker Quickstart
When I started using Airflow (from v1) it was a little tricky for newcomers to get started, but since v2 the documentation improved to such a degree, that it became really easy to get set up in minutes. All the information on how to do a full docker-compose installation is available on Airflow's how to section. Using docker-compose is a great way to learn and test, but it is not recommended to run in production if you don't have specialized expertise in Docker & Docker Compose. In a seperate post I will describe how to use the official Helm chart and deploy Airflow on a Kubernetes cluster, but sometimes (especially for internal company projects in Germany), you won't be given a Kubernetes cluster 😄 then setting up Airflow with docker-compose is a possible alternative.
I will just repeat the useful commands. focusing on a debian-based Linux distro with docker already installed (the most common case after all).
We create a folder and get the official docker-compose file from airflow.
bashmkdir airflow-dockercd airflow-dockercurl -LfO 'https://airflow.apache.org/docs/apache-airflow/2.4.0/docker-compose.yaml'
Extending Airflow's Docker Image
By extending the offical Docker image, you could install extra dependencies. I'm extending the image by also installing Docker on it, which will make it possible to use the unix Docker socket to control the host's docker. Make a Dockerfile within the directory with the following:
dockerfileDockerfileFROM apache/airflow:2.4.0-python3.10USER rootRUN apt-get update \&& apt-get install -y --no-install-recommends \ca-certificates \curl \gnupg \lsb-release# DockerRUN mkdir -p /etc/apt/keyringsRUN curl -fsSL https://download.docker.com/linux/debian/gpg | sudo gpg --dearmor -o /etc/apt/keyrings/docker.gpgRUN echo \"deb [arch=$(dpkg --print-architecture) signed-by=/etc/apt/keyrings/docker.gpg] https://download.docker.com/linux/debian \$(lsb_release -cs) stable" | sudo tee /etc/apt/sources.list.d/docker.list > /dev/nullRUN apt-get updateRUN apt-get install -y --no-install-recommends docker-ce docker-ce-cli containerd.io docker-compose-plugin \&& apt-get autoremove -yqq --purge \&& apt-get clean \&& rm -rf /var/lib/apt/lists/*# UsermodRUN usermod -aG docker airflowUSER airflowCOPY requirements.txt /tmp/requirements.txt# Installing requirements.RUN pip install --no-cache-dir -r /tmp/requirements.txt
And also create a requirements.txt with the following.
txtrequirements.txtapache-airflow[sendgrid]apache-airflow-providers-dockerdocker
The sendgrid provider is just a little extra if you want to send an email to someone (or yourself) a DAG has been completed or if some error occurred.
Now we create to folders and create a .env file with the current user id and the docker image name you would like to name your docker image.
bashmkdir -p ./dags ./logs ./pluginsecho -e "AIRFLOW_UID=$(id -u)" > .envecho -e "AIRFLOW_IMAGE_NAME=yourname/airflow:2.4.0" >> .env
To source the environmental variables, in bash
bash. .env
or
bashsource .env
Implenting the Docker Provider
Now we just need to edit the docker-compose.yaml file a little bit. In the higlighted lines, you'll see the changes. Uncomment the build line so that you are able to build the image, and most important, add the added volume line to be able to control the host's docker instance. You can decide if you want the example DAGs loaded or not.
ymldocker-compose.yaml1version: '3'2x-airflow-common: &airflow-common3 # In order to add custom dependencies or upgrade provider packages you can use your extended image.4 # Comment the image line, place your Dockerfile in the directory where you placed the docker-compose.yaml5 # and uncomment the "build" line below, Then run `docker-compose build` to build the images.6 image: ${AIRFLOW_IMAGE_NAME:-apache/airflow:2.4.0}7 build: . # uncomment to build8 environment: &airflow-common-env9 AIRFLOW__CORE__EXECUTOR: CeleryExecutor10 AIRFLOW__DATABASE__SQL_ALCHEMY_CONN: postgresql+psycopg2://airflow:airflow@postgres/airflow11 # For backward compatibility, with Airflow <2.312 AIRFLOW__CORE__SQL_ALCHEMY_CONN: postgresql+psycopg2://airflow:airflow@postgres/airflow13 AIRFLOW__CELERY__RESULT_BACKEND: db+postgresql://airflow:airflow@postgres/airflow14 AIRFLOW__CELERY__BROKER_URL: redis://:@redis:6379/015 AIRFLOW__CORE__FERNET_KEY: ''16 AIRFLOW__CORE__DAGS_ARE_PAUSED_AT_CREATION: 'true'17 AIRFLOW__CORE__LOAD_EXAMPLES: 'false' # we don't need to load examples now18 AIRFLOW__API__AUTH_BACKENDS: 'airflow.api.auth.backend.basic_auth'19 _PIP_ADDITIONAL_REQUIREMENTS: ${_PIP_ADDITIONAL_REQUIREMENTS:-}20 volumes:21 - ./dags:/opt/airflow/dags22 - ./logs:/opt/airflow/logs23 - ./plugins:/opt/airflow/plugins24 - '/var/run/docker.sock:/var/run/docker.sock' # to control host docker25 user: '${AIRFLOW_UID:-50000}:0'26 depends_on: &airflow-common-depends-on27 redis:28 condition: service_healthy29 postgres:30 condition: service_healthy31
Keep in mind, that in the above, any top-level key which starts with x- will be ignored by compose, x-airflow-common creates anchors, which are used within the services section (indicated by &).
Building and Initializing Airflow
To build the image
bashdocker-compose build
After the build is completed, you can run the init command, this will initialize database
bashdocker-compose up airflow-init
Defining our DAG
We can define our first DAG now, with the following. I just took an example DAG from the Docker Operator's Example DAGs and changed it to use the simple busybox image.
pythondocker.py1from airflow import models2from airflow.operators.bash import BashOperator3from airflow.providers.docker.operators.docker import DockerOperator4from airflow.utils.dates import days_ago56DAG_ID = 'docker_test'78with models.DAG(9 DAG_ID,10 schedule_interval="@once",11 start_date=days_ago(0),12 catchup=False,13 tags=["example", "docker"],14) as dag:15 t1 = BashOperator(task_id='print_date', bash_command='date', dag=dag)16 t2 = BashOperator(task_id='sleep', bash_command='sleep 5', retries=3, dag=dag)17 # [START howto_operator_docker]18 t3 = DockerOperator(19 docker_url='unix://var/run/docker.sock', # Set your docker URL20 command='/bin/sleep 10',21 image='busybox:latest',22 network_mode='bridge',23 task_id='docker_op_tester',24 dag=dag,25 )26 # [END howto_operator_docker]27 t4 = BashOperator(task_id='print_hello', bash_command='echo "hello world!!!"', dag=dag)28 (29 # TEST BODY30 t131 >> [t2, t3]32 >> t433 )34
Running Airflow
Running Airflow is as simple as
bashdocker-compose up
or daemonized
bashdocker-compose up -d
If you naviage with your browser to localhost:8080, you will get the sign in screen

To sign in, use airflow as the Username and airflow as the password. Once you are signed in, you will see the dashboard with a list of all the DAGs (in our case only one)

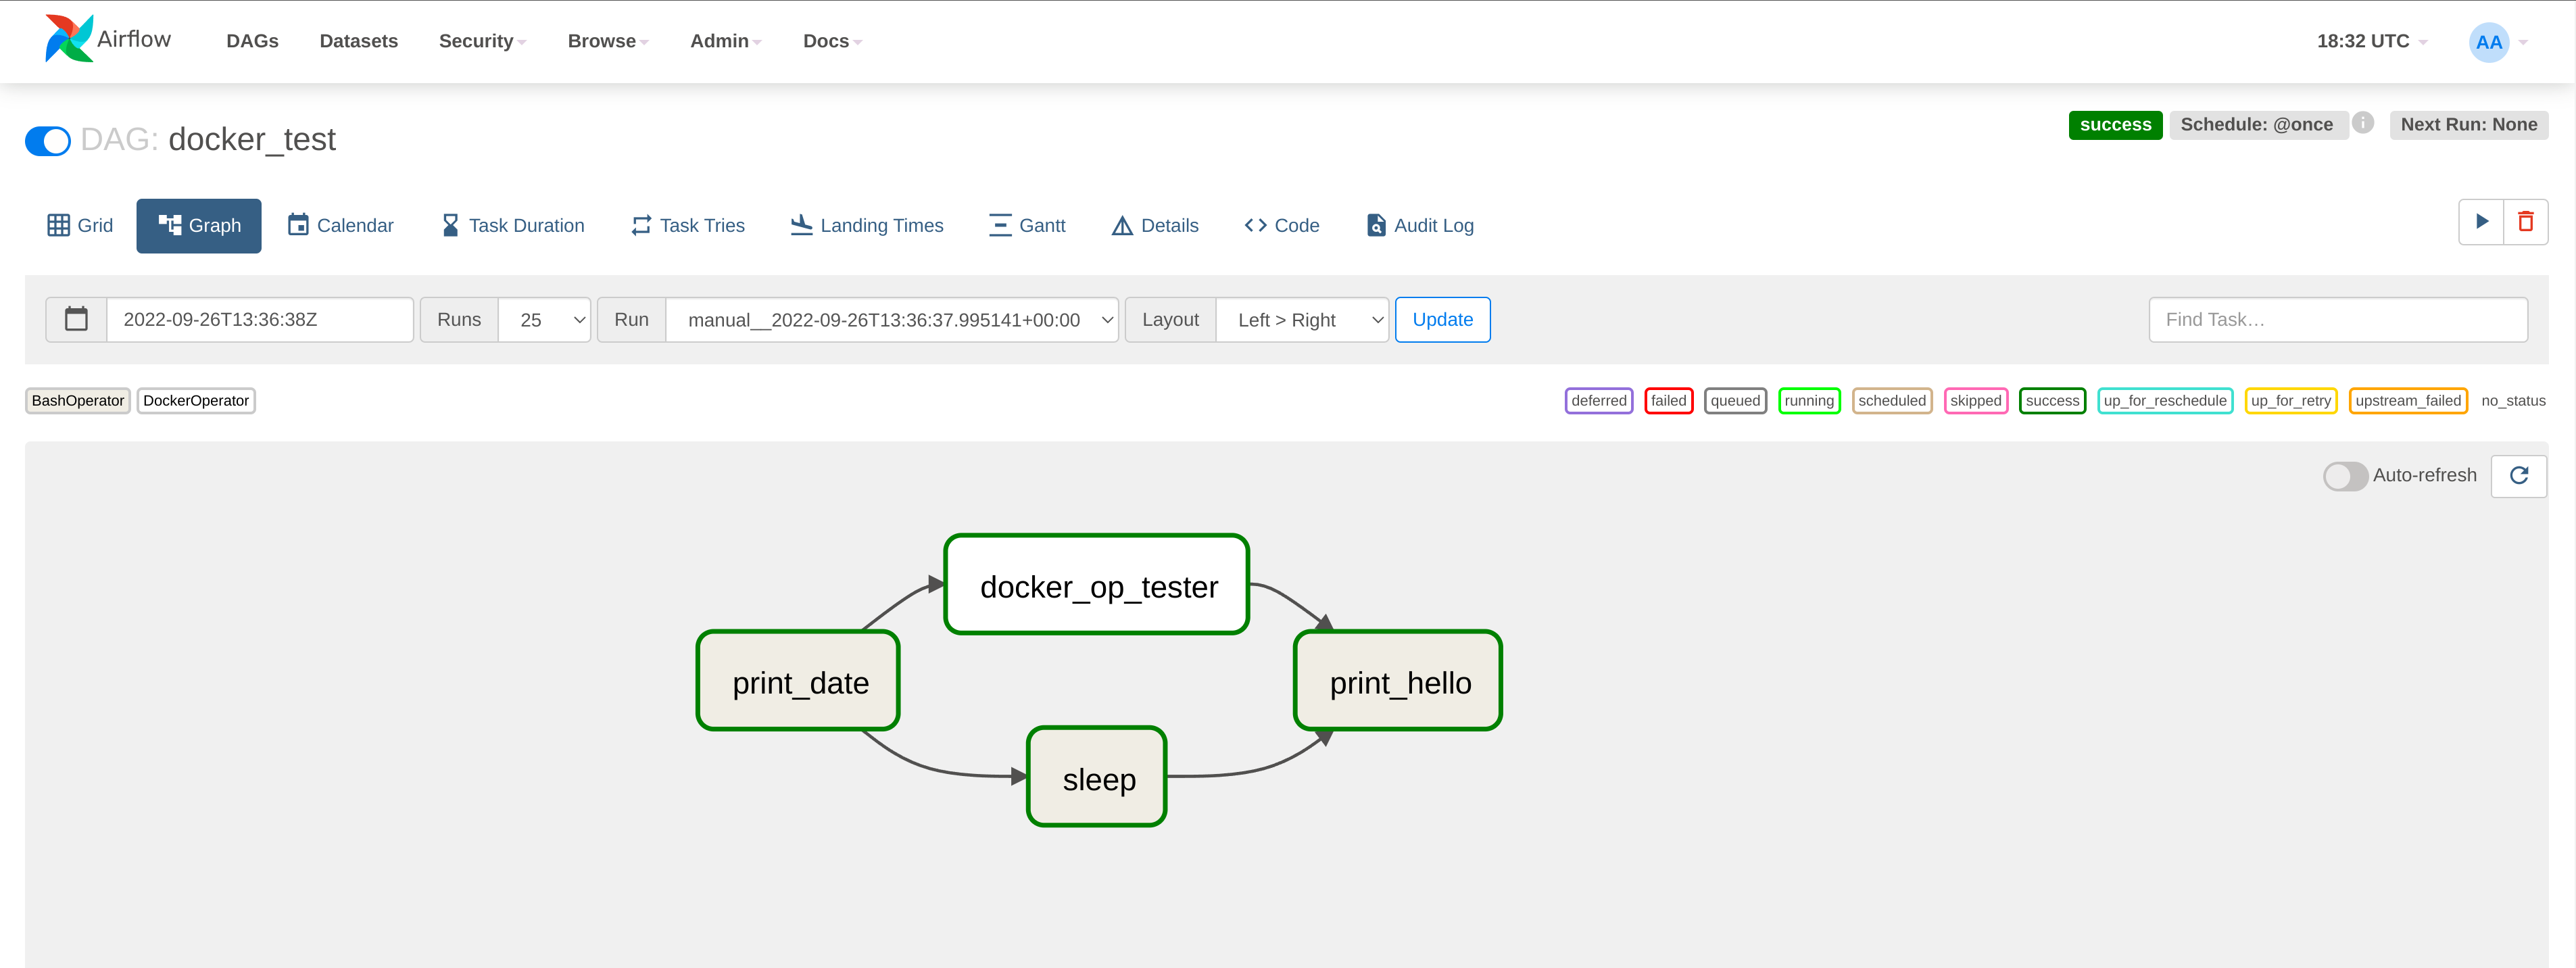
Activate it as shown and you can also trigger it manually to test it out. If you click on the DAG, you can view the status of each task in different views. Graph view for example will show you the dependencies
And grid view will show you a summarized result

To stop Airflow use the commandline
bashCTRL+C
or if it was daemonized in folder
bashdocker-compose down
For our little email example, we can expand the environmental variable file with our sendgrid details. You shoud first sign up on Sendgrid and get and API key and use the API key in the .env file.
.env.envAIRFLOW_IMAGE_NAME=yourname/airflow:2.4.0AIRFLOW_UID=1000SENDGRID_MAIL_FROM=yourmail@yourcompany.comSENDGRID_API_KEY=yoursendgridapi
Source the environmental variables
bash. .env
To change the email backend, we can change the environmental variables on the Docker image shown in the highligted lines.
ymldocker-compose.yaml1version: '3'2x-airflow-common: &airflow-common3 # In order to add custom dependencies or upgrade provider packages you can use your extended image.4 # Comment the image line, place your Dockerfile in the directory where you placed the docker-compose.yaml5 # and uncomment the "build" line below, Then run `docker-compose build` to build the images.6 image: ${AIRFLOW_IMAGE_NAME:-apache/airflow:2.4.0}7 build: .8 environment: &airflow-common-env9 AIRFLOW__CORE__EXECUTOR: CeleryExecutor10 AIRFLOW__DATABASE__SQL_ALCHEMY_CONN: postgresql+psycopg2://airflow:airflow@postgres/airflow11 # For backward compatibility, with Airflow <2.312 AIRFLOW__CORE__SQL_ALCHEMY_CONN: postgresql+psycopg2://airflow:airflow@postgres/airflow13 AIRFLOW__CELERY__RESULT_BACKEND: db+postgresql://airflow:airflow@postgres/airflow14 AIRFLOW__CELERY__BROKER_URL: redis://:@redis:6379/015 AIRFLOW__CORE__FERNET_KEY: ''16 AIRFLOW__CORE__DAGS_ARE_PAUSED_AT_CREATION: 'true'17 AIRFLOW__CORE__LOAD_EXAMPLES: 'false'18 AIRFLOW__API__AUTH_BACKENDS: 'airflow.api.auth.backend.basic_auth'19 AIRFLOW__EMAIL__EMAIL_BACKEND: 'airflow.providers.sendgrid.utils.emailer.send_email' # changing email backend provider20 SENDGRID_MAIL_FROM: ${SENDGRID_MAIL_FROM} # sendgrid from mail21 SENDGRID_API_KEY: ${SENDGRID_API_KEY} # sendgrid api key22 _PIP_ADDITIONAL_REQUIREMENTS: ${_PIP_ADDITIONAL_REQUIREMENTS:-}23 volumes:24 - ./dags:/opt/airflow/dags25 - ./logs:/opt/airflow/logs26 - ./plugins:/opt/airflow/plugins27 - '/var/run/docker.sock:/var/run/docker.sock'28 user: '${AIRFLOW_UID:-50000}:0'29 depends_on: &airflow-common-depends-on30 redis:31 condition: service_healthy32 postgres:33 condition: service_healthy34
AIRFLOW__EMAIL__EMAIL_BACKEND corresponds to a line in airflow's config file. You can change these values with environmental variables using the same convention. To make another DAG, we can just copy te previous DAG and rename the ID and add the Sendgrid task.
pythondocker_with_sendgrid.py1from airflow import models2from airflow.operators.bash import BashOperator3from airflow.providers.docker.operators.docker import DockerOperator4from airflow.utils.dates import days_ago5from airflow.operators.email_operator import EmailOperator67DAG_ID = 'docker_test_with_sendgrid'89with models.DAG(10 DAG_ID,11 schedule_interval="@once",12 start_date=days_ago(0),13 catchup=False,14 tags=["example", "docker", "sendgrid"],15) as dag:16 t1 = BashOperator(task_id='print_date', bash_command='date', dag=dag)17 t2 = BashOperator(task_id='sleep', bash_command='sleep 5', retries=3, dag=dag)18 # [START howto_operator_docker]19 t3 = DockerOperator(20 docker_url='unix://var/run/docker.sock', # Set your docker URL21 command='/bin/sleep 10',22 image='busybox:latest',23 network_mode='bridge',24 task_id='docker_op_tester',25 dag=dag,26 )27 # [END howto_operator_docker]28 t4 = BashOperator(task_id='print_hello', bash_command='echo "hello world!!!"', dag=dag)29 t5 = EmailOperator(task_id="send_mail",30 to='yourmail@yourcompany.com',31 subject='Test mail',32 html_content='<p> You have got mail! <p>',33 dag=dag)34 (35 # TEST BODY36 t137 >> [t2, t3]38 >> t439 >> t540 )41
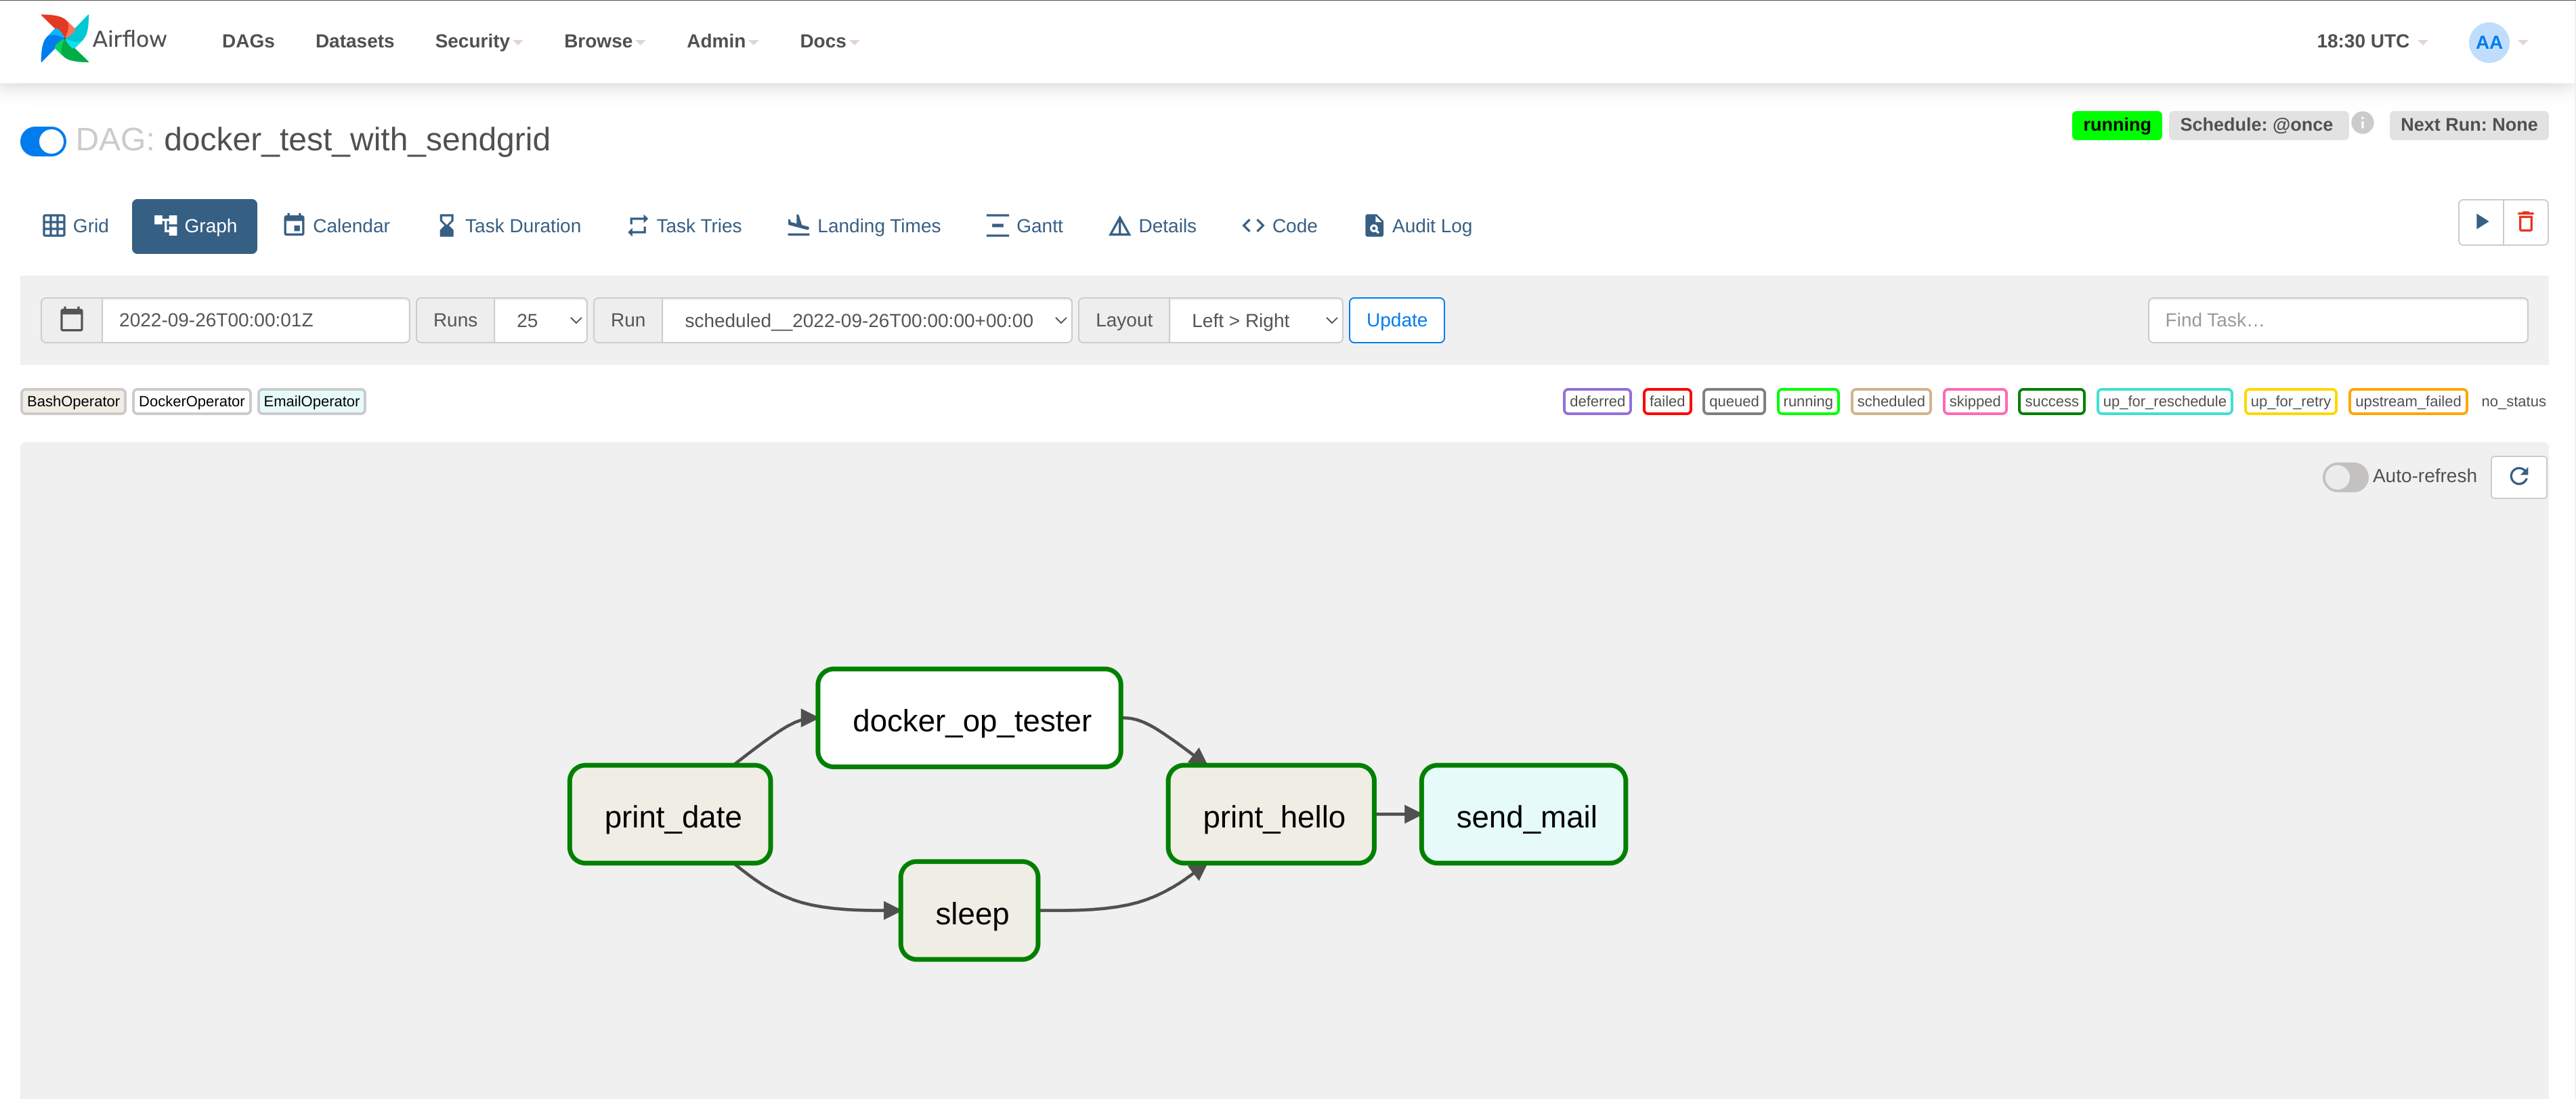
Now when we open Airflow, we will see the new DAG in our Dashboard

If you triggered it, you can also look that the Graph view changed with the added dependency
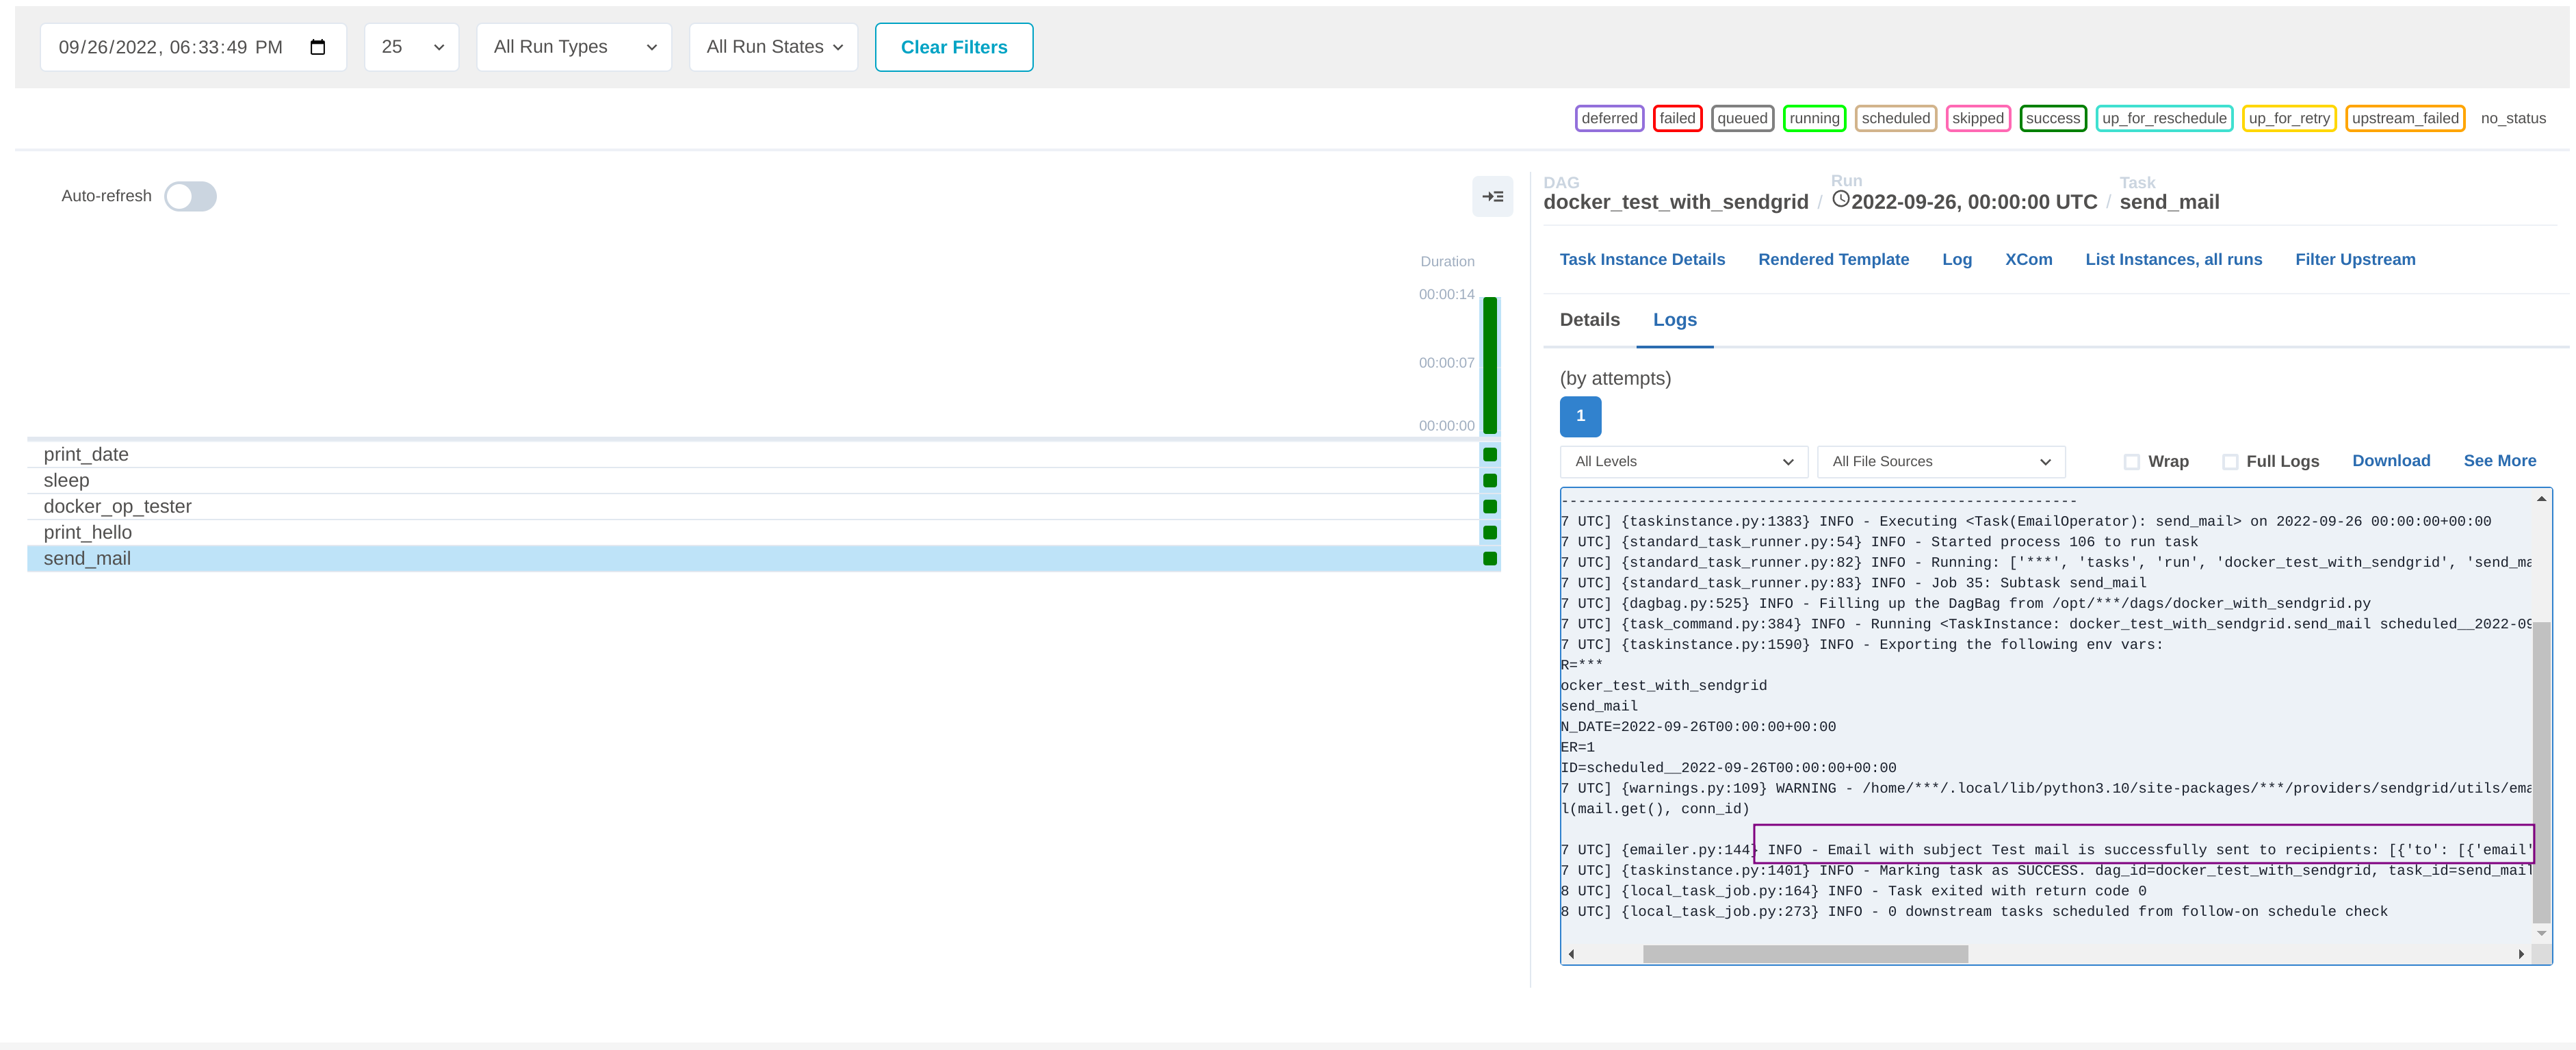
Finally if Sendgird was setup correctly, you can also look at the logs to see that the email has been sent and your email inbox should have the new email
If you need to do a deep dive, you can shell into a running container by getting the shell script from Airflow
bashcurl -LfO 'https://airflow.apache.org/docs/apache-airflow/2.4.0/airflow.sh'chmod +x airflow.sh
and then while Airflow is running
bash./airflow.sh bash
If you made any mistakes and/or want to remove everything
bashdocker-compose down --volumes --remove-orphans
And that's it. The full source code can be found on my Github.